

How Do You Add Ceiling Tags In Revit?
We learned how to create railings in Revit model. Now we will work on different view type in this tutorial.
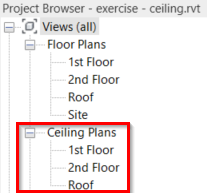
If you lot've noticed, in Revit Views we accept several views groups. Until now, the flooring plans are the most views we apply. Merely beneath floor plans, there is another plan view group: ceiling plans. We use this view in this tutorial. We covered how to access Revit views in view navigation tutorial hither.
Y'all are already familiar with the concept of ceiling plans, aren't you? Imagine nosotros are actually inside a room. When you lot meet beneath, you will run across the floor plan. And if y'all see above you, you volition meet the ceiling programme. There are some objects you only see in these plans. And and then the other style: some ceiling hosted objects tin can't be seen on your floor programme.
At present open up your 2nd floor ceiling plan.
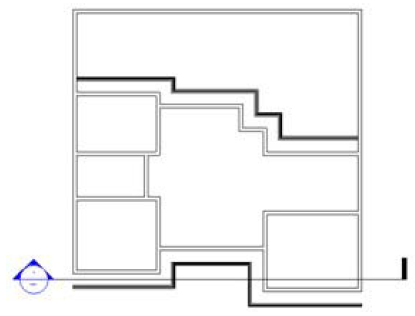
You volition encounter our roof fascia announced in this view. It was placed in a higher place the 2d floor, and so we tin run across it. Simply we don't need roof fascia to appear in this plan. Select the roof fascia. At present hibernate it by click hide>elements from your contextual ribbon.

Hiding this roof fascia will hide it not only for viewing. But will likewise disappear when you lot plot information technology. Now activate the ceiling tool.

Move your pointer to your plan. You should meet now Revit is trying to discover rooms and highlight information technology. Move your pointer where yous desire to place it. Click your mouse.

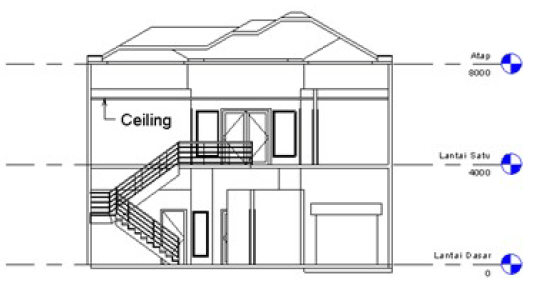
Identify ceilings to all rooms on the 2nd floor. After you lot finish, make a section to review our model.
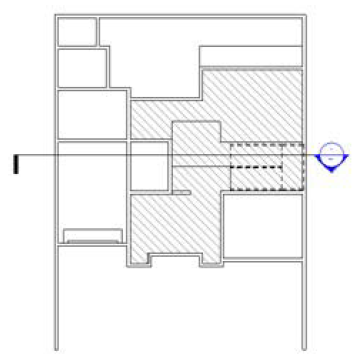
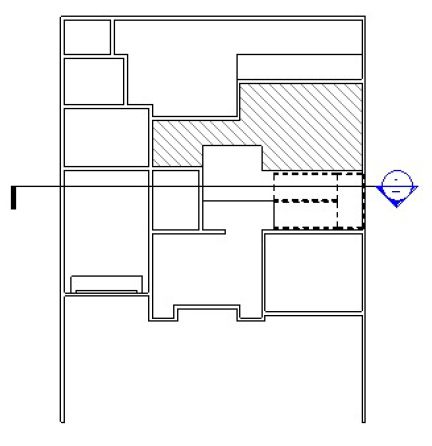
Now let's movement to the 1st floor-ceiling programme. 1st floor requires more than work. We accept a void and a stair. We are going to define the ceiling in this area by sketching it. First, place ceilings in every room in this programme, except for the hatched area below.
Later you terminate, activate place ceiling. Find sketch tool on your ribbon.

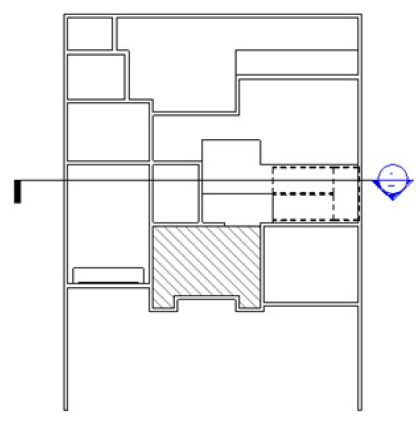
Sketching here is just the same as creating a floor. Sketch it every bit a closed polygon, and click end. That'southward it :) Create a sketch for like below.
And after you finish with that railing, proceed finishing the 1st-floor ceiling by creating another i like below.
Next, nosotros will discuss creating ceiling edges, to close the gap between the 2nd-floor slab and the 1st-floor ceiling.
*You lot can purchase this Revit tutorial compilation in an due east-book. Detect out the books in our E-Store .

How Do You Add Ceiling Tags In Revit?,
Source: https://www.cad-notes.com/creating-ceiling-in-revit-model/
Posted by: rubioalwass.blogspot.com
0 Response to "How Do You Add Ceiling Tags In Revit?"
Post a Comment